Introduction
AgOpenGPS (AOG) is Open source GPS guidance software that can be used as a basic lightbar, right through to RTK Autosteer with section control. All systems need a Windows 10 tablet/laptop and GNSS/RTK receiver and antennae to be mounted in the vehicle, With the AOG software installed and the GNSS receiver configured with the antennae in a suitable location you have all you need for a class leading lightbar.
To go to a full autosteer system you need to add an autosteer PCB, a wheel angle sensor and some form of controlling the steering, typically either an electric motor to physically turn the steering wheel or a hydraulic steering valve. An RTK signal can then be added, either through your own base station or using a free correction signal from RTK2Go.
This guide will take you through all the steps you need to take to make a full autosteering vehicle with RTK correction, typically this can be achieved for a budget of £1000-£1500, depending on the level of DIY ability and the standard of finish you'd like.
The ethos of AOG is very much 'farmers helping farmers'. there is a thriving community all willing to offer help and guidance and freely sharing ideas, designs and files to make it happen. Anybody can do this, you don't need to be an electronics engineer or computer programmer.
The finished system is feature rich, your vehicle will drive in perfect straight lines, automatically do headland U turns, map fields, record coverage, section control etc etc...
There are links to suggested products these are just examples to help you make the right purchases, feel free to research your own choices, so let's begin.....
The Computer
You will need a Windows 10 computer to run the AOG software, most people use a Windows tablet as these are easy to mount in a cab and are typically robust to put up with environment (vibration, dust etc.).
Important attributes your tablet should have:
a Panasonic FZ-G1, like:

Other recommended brand is Getac, such as:

Once you've purchased your tablet you will need a 12V cigarette lighter style power supply for it and to mount it in a convenient location in your cab, RAM mounts are recommended but there are many types easily available or as many do fabricate your own.
Install AgOpenGPS software
You need to install the AgOpenSoftware which is available here:

 github.com
I would recommend using the latest 'stable release' at the time of writing that is 5.6.2, but this will change with time and if you want the latest features and updates choose the most recent 'pre release'
Once you've installed the software you can open it and use 'Simulator mode' were you can setup a machine and then drive it using the cursor keys, its good to do this to see all the customisable options and get a feel for the software.
The GNSS/RTK receiver
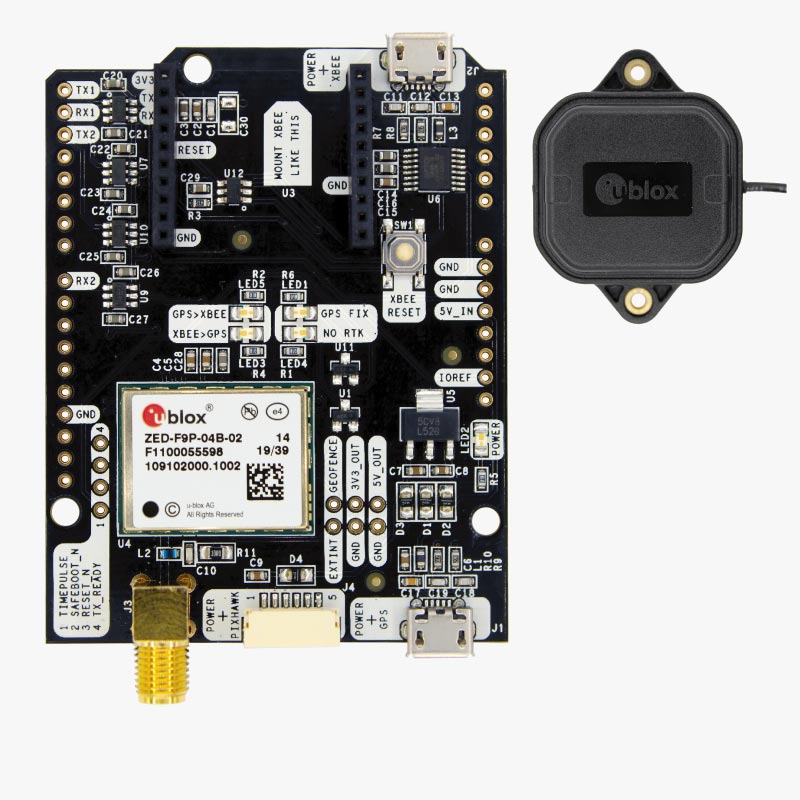
You now need to add a GNSS receiver and antennae in order to get an accurate location, for this we use an ArduSimple simpleRTK2B which is based on the u-blox ZED-F9P and u-blox ANN-MB-00 Antenna.
This is the one you need:
 www.ardusimple.com
The antenna is small and discreet but don't think this has compromised performance compared to a giant dome painted in corporate colours, this setup will achieve sub-centimetre accuracy.
If you intend to go straight to autosteer then you can use this receiver on the autosteer PCB but it may be easier to skip this step and go straight to an autosteer PCB that will have this mounted on the board already.
If you just want lightbar guidance then you need to plug a USB cable into the simplertk2b and then into your tablet.
Open AgIO and connect the receiver to the tablet by choosing the correct COM port next to the antenna icon. You will likely have to upload a config file to the simplertk2b and change the baudrate.
You need to download U centre, click on the link for F9 products:
(I will make a YouTube video for how to update the firmware and add a config file as will be easier than typing!)
The firmware and config files are in the support folders.
The Autosteer PCB
There are many designs of AOG PCB, we will concentrate on the recently released 'All in One' (AIO) PCB as this is the easiest to get going with and is what most future AOG development will be based around. As of April 2023, the latest AIO PCB is the V4.1
Historically AOG started with USB (Serial) connections these are fast and convenient but have a few drawbacks, you need to select the correct COM ports, sometimes every time you load AOG, and they can work loose particularly in a cab that is being shaken about. Thus UDP/Ethernet is now the standard connection between the PCB and the tablet. UDP is more reliable and once configured will remain so, allowing current and future hardware to all communicate via a single Ethernet port.
The PCB is made up of:
It's also available as either 'Standard' or 'Micro' PCB, this refers to the size of the ArduSimple simpleRTK2B receiver. Both boards have space for two GNSS receivers to plug into header sockets.
The PCBs can either be DIY made, by sending the Gerber file to a PCB manufacturer, usually JLCPCB and then ordering and soldering all the components onto the board,
or, partially assembled by the PCB manufacture with most components surface mounted (SMD) but any missing parts (common) and the connector(s) will need soldering to the board.
In both instances, you will need to buy a Teensy 4.1, IMU, Cytron and Ampseal/Deutsch connector and solder the pins to the board.
Alternatively you can buy a complete PCB with everything mounted and soldered in a custom 3D printed box or a Hammond enclosure and the AOG firmware pre-installed and configured on the Teensy.
I have PCBs available in stock for sale in the UK as below:


AIO PCB c/w ArduSimple RTK Receiver and antennae, Teensy 4.1 firmware installed, Adafruit BNO085, Cytron MD13S and Ampseal 23 pin socket and Ampseal pre wired plug, in a custom box, all ready to go, for £TBC+Vat. Please PM for more details.
If you build your own PCB you will need to install firmware on the Teensy, this is the same process as if you need to upgrade the firmware at a later date.
You need to download Arduino IDE 2.0:
Then install the Teensy add-on, guide here:
 www.pjrc.com
When you download the AOG software there will be a folder of support files in it you find the relevant firmware, the firmware or sketch is made up of several files the current AIO firmware is 12 files, these all need to be in the same sketch folder which you open in Arduino IDE, then plug a USB cable into the Teensy and the other end your PC and click on 'Upload' this will verify and compile the file to make sure there are no errors and then upload the sketches onto the Teensy.
Wheel Angle Sensor (WAS)
A good wheel angle sensor setup is crucial to how well AOG will autosteer. This really needs emphasising, you do not want any play in the linkage or to connect to part of the steering system that itself has any play in it. And its important to use an accurate sensor with the correct range of sensing. Many systems performing poorly are often traced back to a faulty WAS or a poor installation. So this needs particular care to get right.
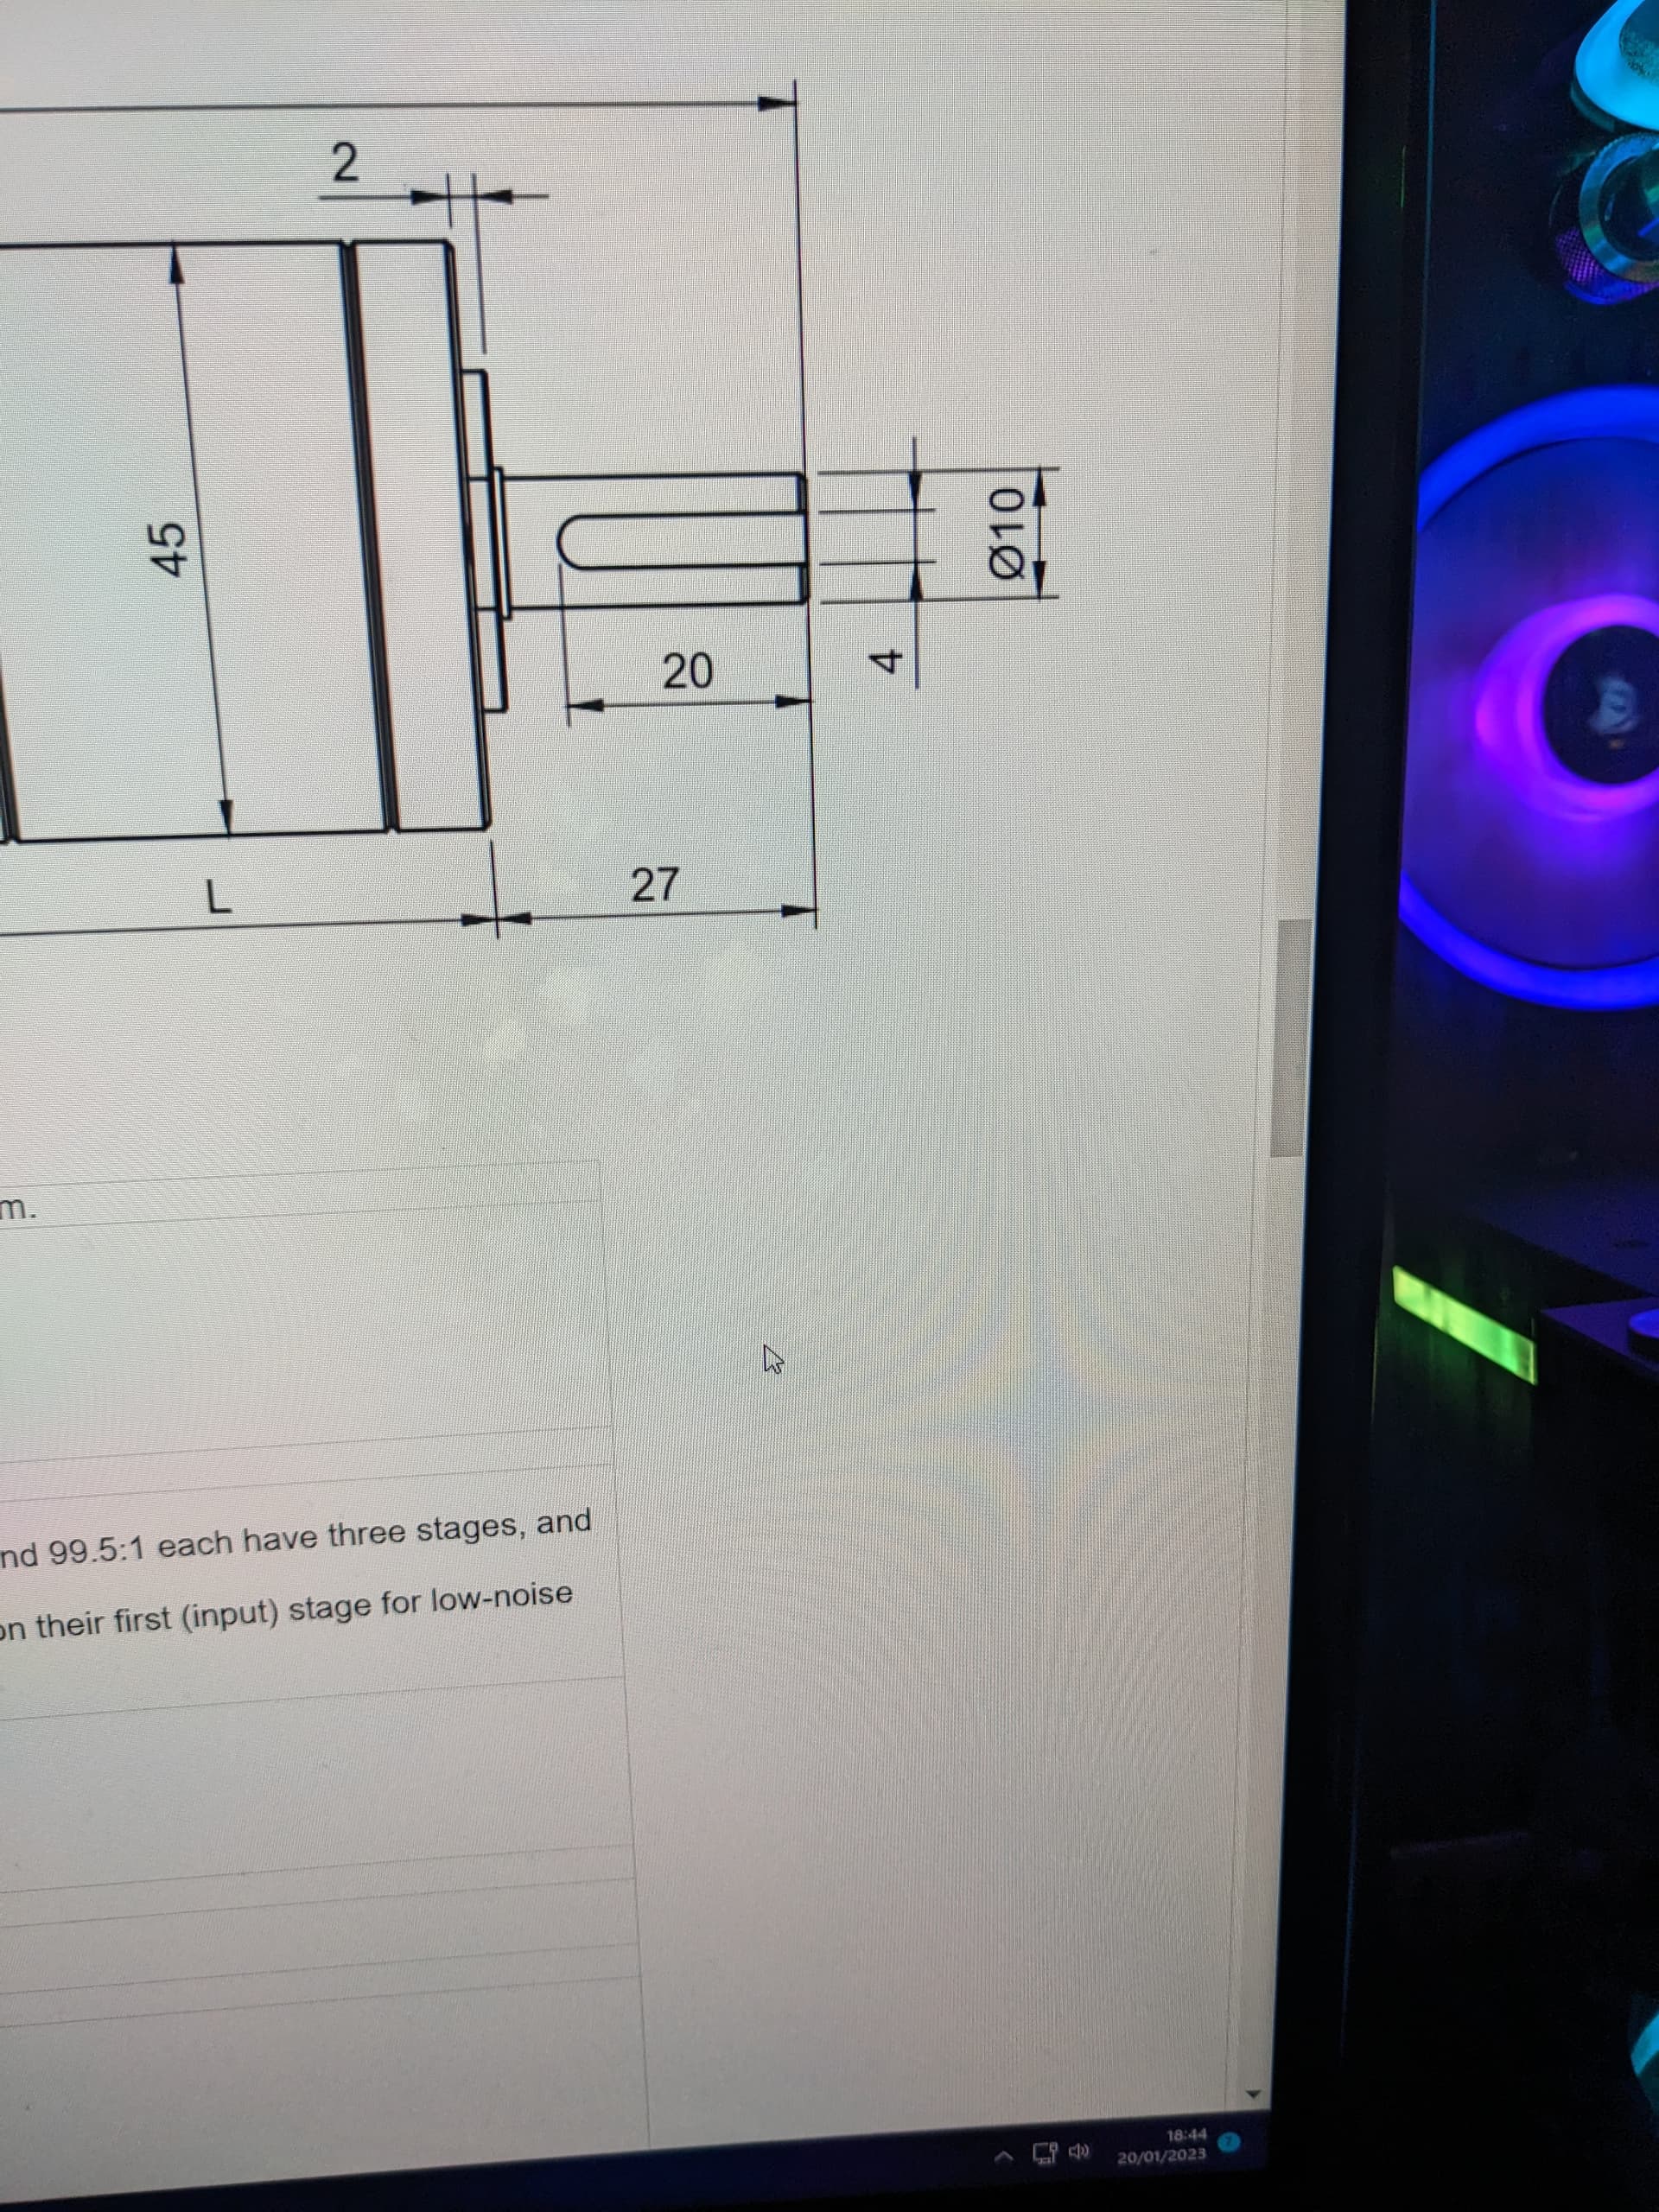
The most commonly used WAS in the UK is the RQH100030 which is most often used as a Land Rover Discovery ride height sensor. It is a hall effect sensor with approximately 90 degrees of sensing range on the main arm, it costs approx. £30 for example:
 www.johncraddockltd.co.uk
AOG uses a 3 wire system for the WAS; 5V supply, ground and a signal wire.
The voltage of the signal wire will proportionally vary from 0.5-4.5V depending on where the arm is in its arc of travel. So with the arm to the far right of its sensing range it will output 4.5V on the signal wire and 0.5V when the arm is to the far left of the sensing range.
So you need to mount your WAS, that when the tractor wheels are straight ahead the signal wire is outputing approx. 2.25V. You can use a multimeter to test, its normal for the arm to be at right angles to the sensor body to be in the centre of its sensing range. (your sensor might have an output greater than 4.5V and smaller than 0.5V, but it should be close).
The RQH100030 has a very robust arm that can cope with a certain degree of misalignment and the rubber bushes on the rod allow for varying geometry and of course its designed to cope with a hostile environment of water spray/mud/salt that a 4x4 encounters so is well suited to Agricultural use.
There are many examples on this thread on the AOG forum:
 discourse.agopengps.com
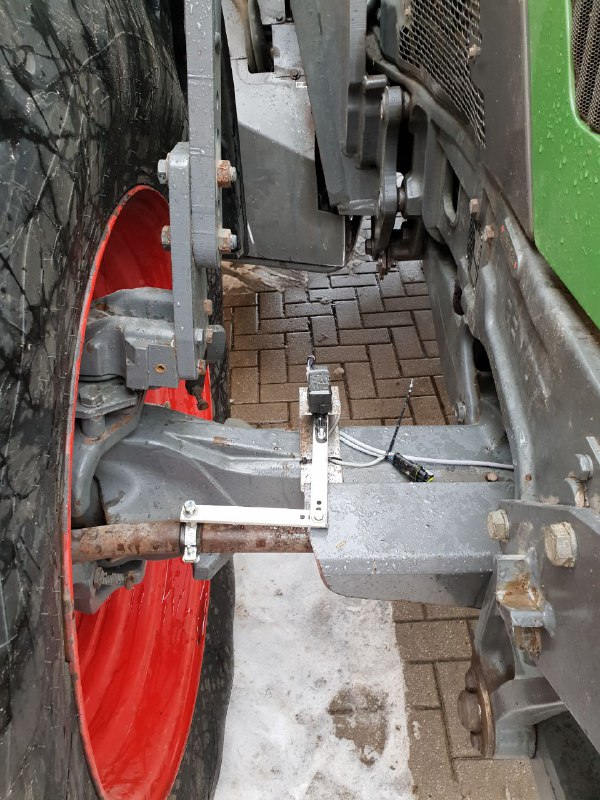
typical example, in this instance on a Claas Arion with a Carraro Independent Front Suspension (IFS) axle:
.jpg")
Its very important if you have IFS that the WAS is not influenced by the suspension travel, so needs to be connected to two parts that are in reference.
The RQH100030 arm can travel 360 degrees without damage so it doesn't matter if you cannot capture the full turning lock with the sensor ranging, the sensor won't be damaged. Note not all sensors are like this and can be damaged if they travel beyond their sensing range.
It doesn't matter which way around you mount the WAS, you can easily invert the direction in the AOG software.
The pin out for the RQH100030 is:
Pin 5 is 5V+, connect to Ampseal pin 1 on the AIO PCB
Pin 4 is Signal, connect to Ampseal pin 2 on the AIO PCB
Pin 1 is ground, connect to Ampseal pin 4 on the AIO PCB
You can buy a pre-wired plug here:

The steering can be controlled by either physically turning the existing steering wheel, fitting a hydraulic steering valve or in some instances for autosteer ready tractors using Canbus.
To physically turn the steering wheel there are two main options, a Foam wheel or steering cogs.
The foam wheel is a small wheel on a hub connected to an electric motor with a spring loaded bracket to allow it to be engaged and disengage with the steering wheel. A phidgets 24V motor is most common, about £80, usually the bracket is DIY fabricated.
Phidgets motor: https://www.phidgets.com/?tier=3&catid=19&pcid=16&prodid=993
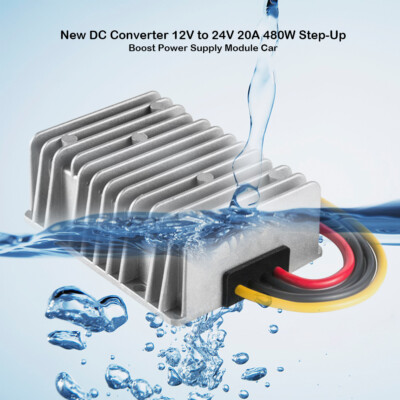
You will need a 12V to 24V converter to power the Cytron for the Phidgets, 12V to 24V 480W/20A
Such as:
Steering cogs can either be 3D printed plastic or metal (lawnmower ring gear is often used!). There are many 3D printed steering cog files available, this is usually a good exscuse to buy a 3D printer or they can be printed by a third party for around £50.
Link to PotatoFarmer's universal steering cogs and motor holder: https://discourse.agopengps.com/t/universal-fit-gear-system-with-quick-tach-motor-holder/6579
If you don't have a 3D printer you will need to send the STL files in the link above to someone who does. There are commercial companies online who do this (but very expensive) or lots of people on eBay offering there services (usually much cheaper!).
The Cytron motor controller and Phidgets motor remain engaged even when autosteer is turned off in the software, the Cytron applies a 'brake' signal to the motor, thus making it hard to turn when disengaged. Also when the PCB is powered off, if left connected the motor acts as a generator, so we need to fit a relay to break the circuit.
You need a 4 pin NO 12V relay, a good quality one is: Bosch 0332019110
Wire directly to Ampseal plug as follows:
Relay Pin 30: Pin 5 Ampseal
Relay Pin 85: Pin 7 Ampseal
Relay Pin 86: Pin 21 Ampseal
Relay Pin 87: Electric Motor left

AgOpenGPS (AOG) is Open source GPS guidance software that can be used as a basic lightbar, right through to RTK Autosteer with section control. All systems need a Windows 10 tablet/laptop and GNSS/RTK receiver and antennae to be mounted in the vehicle, With the AOG software installed and the GNSS receiver configured with the antennae in a suitable location you have all you need for a class leading lightbar.
To go to a full autosteer system you need to add an autosteer PCB, a wheel angle sensor and some form of controlling the steering, typically either an electric motor to physically turn the steering wheel or a hydraulic steering valve. An RTK signal can then be added, either through your own base station or using a free correction signal from RTK2Go.
This guide will take you through all the steps you need to take to make a full autosteering vehicle with RTK correction, typically this can be achieved for a budget of £1000-£1500, depending on the level of DIY ability and the standard of finish you'd like.
The ethos of AOG is very much 'farmers helping farmers'. there is a thriving community all willing to offer help and guidance and freely sharing ideas, designs and files to make it happen. Anybody can do this, you don't need to be an electronics engineer or computer programmer.
The finished system is feature rich, your vehicle will drive in perfect straight lines, automatically do headland U turns, map fields, record coverage, section control etc etc...
There are links to suggested products these are just examples to help you make the right purchases, feel free to research your own choices, so let's begin.....
The Computer
You will need a Windows 10 computer to run the AOG software, most people use a Windows tablet as these are easy to mount in a cab and are typically robust to put up with environment (vibration, dust etc.).
Important attributes your tablet should have:
- Bright screen, typically a minimum of 400 nits
- SSD hard drive, these are very fast to load and initial start-up also have no moving parts like a traditional hard drive that may be susceptible to vibrations you're likely to encounter on an agricultural vehicle.
- Windows 10
- 4GB ram
- Ethernet Port(s) it is possible to use a USB to Ethernet adapter
- USB Port(s)
- WiFi
a Panasonic FZ-G1, like:
Panasonic ToughPad FZ-G1 MK3 i5 8GB 128GB GPS 4G Rugged Diagnostic Tablet WIN 10 | eBay
Panasonic ToughPad FZ-G1 MK3 Rugged Diagnostic Tablet. Model No: FZ-G1 (MK3). 128Gb SSD (these use mSata SSD and you can fit your own large capacity as required). Built in Dual Webcam (one front one back) plus all standard features for the model.
www.ebay.co.uk
Other recommended brand is Getac, such as:
GETAC V110 G2 i5 Touch 128 SSD Fully Rugged Convertible Notebook | eBay
Find many great new & used options and get the best deals for GETAC V110 G2 i5 Touch 128 SSD Fully Rugged Convertible Notebook at the best online prices at eBay! Free delivery for many products.
www.ebay.co.uk
Once you've purchased your tablet you will need a 12V cigarette lighter style power supply for it and to mount it in a convenient location in your cab, RAM mounts are recommended but there are many types easily available or as many do fabricate your own.
Install AgOpenGPS software
You need to install the AgOpenSoftware which is available here:
Releases · farmerbriantee/AgOpenGPS
Ag Precision Mapping, Section Control and Guidance Software - farmerbriantee/AgOpenGPS
github.com
I would recommend using the latest 'stable release' at the time of writing that is 5.6.2, but this will change with time and if you want the latest features and updates choose the most recent 'pre release'
Once you've installed the software you can open it and use 'Simulator mode' were you can setup a machine and then drive it using the cursor keys, its good to do this to see all the customisable options and get a feel for the software.
The GNSS/RTK receiver
You now need to add a GNSS receiver and antennae in order to get an accurate location, for this we use an ArduSimple simpleRTK2B which is based on the u-blox ZED-F9P and u-blox ANN-MB-00 Antenna.
This is the one you need:
simpleRTK2B - Basic Starter Kit
The Starter Kit allows simple and fast evaluation of Dual Band GNSS (GPS/Galileo/Glonass/Beidou) RTK technology, based on u-blox ZED-F9P module.
The antenna is small and discreet but don't think this has compromised performance compared to a giant dome painted in corporate colours, this setup will achieve sub-centimetre accuracy.
If you intend to go straight to autosteer then you can use this receiver on the autosteer PCB but it may be easier to skip this step and go straight to an autosteer PCB that will have this mounted on the board already.
If you just want lightbar guidance then you need to plug a USB cable into the simplertk2b and then into your tablet.
Open AgIO and connect the receiver to the tablet by choosing the correct COM port next to the antenna icon. You will likely have to upload a config file to the simplertk2b and change the baudrate.
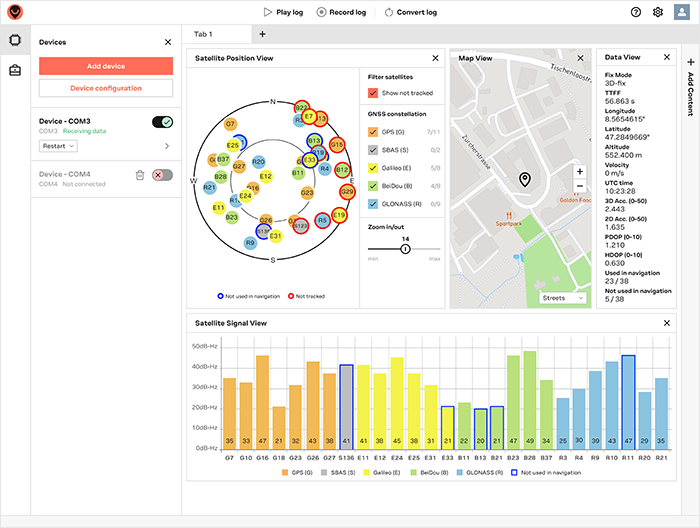
You need to download U centre, click on the link for F9 products:

(I will make a YouTube video for how to update the firmware and add a config file as will be easier than typing!)
The firmware and config files are in the support folders.
The Autosteer PCB
There are many designs of AOG PCB, we will concentrate on the recently released 'All in One' (AIO) PCB as this is the easiest to get going with and is what most future AOG development will be based around. As of April 2023, the latest AIO PCB is the V4.1
Historically AOG started with USB (Serial) connections these are fast and convenient but have a few drawbacks, you need to select the correct COM ports, sometimes every time you load AOG, and they can work loose particularly in a cab that is being shaken about. Thus UDP/Ethernet is now the standard connection between the PCB and the tablet. UDP is more reliable and once configured will remain so, allowing current and future hardware to all communicate via a single Ethernet port.
The PCB is made up of:
- Board with all the traces and soldered components, ADS1115 signal processor (for WAS), capacitors, resistors, headers etc...
- Teensy 4.1, this is the processor for the board that processes all the data from the GNSS/RTK, IMU and Wheel angle sensor and sends the signals to the motor driver to control the steering motor or valve.
- IMU- Inertial measurement unit, this is a gyroscope/tilt monitor that measures the tilt and pitch of the vehicle to enable the position to be corrected. An Adafruit BNO085 is the default IMU.
- Motor/Valve controlled- Usually a Cytron MD13S this sends the power to the motor or valve to control the vehicle steering
- GNSS/RTK receiver- can either be one receiver or dual receivers. This will be an ArduSimple simpleRTK2B F9P.
It's also available as either 'Standard' or 'Micro' PCB, this refers to the size of the ArduSimple simpleRTK2B receiver. Both boards have space for two GNSS receivers to plug into header sockets.
The PCBs can either be DIY made, by sending the Gerber file to a PCB manufacturer, usually JLCPCB and then ordering and soldering all the components onto the board,
or, partially assembled by the PCB manufacture with most components surface mounted (SMD) but any missing parts (common) and the connector(s) will need soldering to the board.
In both instances, you will need to buy a Teensy 4.1, IMU, Cytron and Ampseal/Deutsch connector and solder the pins to the board.
Alternatively you can buy a complete PCB with everything mounted and soldered in a custom 3D printed box or a Hammond enclosure and the AOG firmware pre-installed and configured on the Teensy.
I have PCBs available in stock for sale in the UK as below:
AIO PCB c/w ArduSimple RTK Receiver and antennae, Teensy 4.1 firmware installed, Adafruit BNO085, Cytron MD13S and Ampseal 23 pin socket and Ampseal pre wired plug, in a custom box, all ready to go, for £TBC+Vat. Please PM for more details.
If you build your own PCB you will need to install firmware on the Teensy, this is the same process as if you need to upgrade the firmware at a later date.
You need to download Arduino IDE 2.0:
Downloading and installing the Arduino IDE 2 | Arduino Documentation
A quick guide on how to install the IDE 2 on your operating system.
docs.arduino.cc
Then install the Teensy add-on, guide here:
Eurorack Synth Prototype
When you download the AOG software there will be a folder of support files in it you find the relevant firmware, the firmware or sketch is made up of several files the current AIO firmware is 12 files, these all need to be in the same sketch folder which you open in Arduino IDE, then plug a USB cable into the Teensy and the other end your PC and click on 'Upload' this will verify and compile the file to make sure there are no errors and then upload the sketches onto the Teensy.
Wheel Angle Sensor (WAS)
A good wheel angle sensor setup is crucial to how well AOG will autosteer. This really needs emphasising, you do not want any play in the linkage or to connect to part of the steering system that itself has any play in it. And its important to use an accurate sensor with the correct range of sensing. Many systems performing poorly are often traced back to a faulty WAS or a poor installation. So this needs particular care to get right.
The most commonly used WAS in the UK is the RQH100030 which is most often used as a Land Rover Discovery ride height sensor. It is a hall effect sensor with approximately 90 degrees of sensing range on the main arm, it costs approx. £30 for example:
RQH100030 Suspension Height Sensor Discovery 2
RQH100030 Suspension Height Sensor Discovery 2 from John Craddock Ltd. International suppliers of Discovery suspension and Land Rover parts.
AOG uses a 3 wire system for the WAS; 5V supply, ground and a signal wire.
The voltage of the signal wire will proportionally vary from 0.5-4.5V depending on where the arm is in its arc of travel. So with the arm to the far right of its sensing range it will output 4.5V on the signal wire and 0.5V when the arm is to the far left of the sensing range.
So you need to mount your WAS, that when the tractor wheels are straight ahead the signal wire is outputing approx. 2.25V. You can use a multimeter to test, its normal for the arm to be at right angles to the sensor body to be in the centre of its sensing range. (your sensor might have an output greater than 4.5V and smaller than 0.5V, but it should be close).
The RQH100030 has a very robust arm that can cope with a certain degree of misalignment and the rubber bushes on the rod allow for varying geometry and of course its designed to cope with a hostile environment of water spray/mud/salt that a 4x4 encounters so is well suited to Agricultural use.
There are many examples on this thread on the AOG forum:
Wheel Angle Sensor Installation Examples - Lots of Pictures
I have collected many images from various Telegram groups of wheel angle installations. I’ve noticed that new users (myself included) land here in the discourse and struggle to find good pictures (wiped during the server move). There’s about every possible orientation here. Top of kingpin...
discourse.agopengps.com
typical example, in this instance on a Claas Arion with a Carraro Independent Front Suspension (IFS) axle:
Its very important if you have IFS that the WAS is not influenced by the suspension travel, so needs to be connected to two parts that are in reference.
The RQH100030 arm can travel 360 degrees without damage so it doesn't matter if you cannot capture the full turning lock with the sensor ranging, the sensor won't be damaged. Note not all sensors are like this and can be damaged if they travel beyond their sensing range.
It doesn't matter which way around you mount the WAS, you can easily invert the direction in the AOG software.
The pin out for the RQH100030 is:
Pin 5 is 5V+, connect to Ampseal pin 1 on the AIO PCB
Pin 4 is Signal, connect to Ampseal pin 2 on the AIO PCB
Pin 1 is ground, connect to Ampseal pin 4 on the AIO PCB
You can buy a pre-wired plug here:
YMQ503220 Discovery 2 3 Height Sensor Wiring Harness Plug Land Rover Suspension | eBay
Part Number: YMQ503220. For Land Rover Discovery 3 2005-2009. For Range Rover Sport L320 2005-2009. For Range Rover L322 2002-2009. 1 Connectors Harness. Note: Light shooting and different displays may cause the colour of the item in the picture a little different from the real thing.
www.ebay.co.uk
Steering Control
The steering can be controlled by either physically turning the existing steering wheel, fitting a hydraulic steering valve or in some instances for autosteer ready tractors using Canbus.
To physically turn the steering wheel there are two main options, a Foam wheel or steering cogs.
The foam wheel is a small wheel on a hub connected to an electric motor with a spring loaded bracket to allow it to be engaged and disengage with the steering wheel. A phidgets 24V motor is most common, about £80, usually the bracket is DIY fabricated.
Phidgets motor: https://www.phidgets.com/?tier=3&catid=19&pcid=16&prodid=993
You will need a 12V to 24V converter to power the Cytron for the Phidgets, 12V to 24V 480W/20A
Such as:
480W DC-DC 12V to 24V Step-Up Converter Car Power Supply Module Regulator nt | eBay
Output current: 20A (max), 480W. 1x 12V to 24V DC Converter. More than 90% power conversion efficiency. 100% Waterproof with Anti-shock protection. Light weight and ultra-compact size. We will try our best to reduce the risk of the custom duties.
www.ebay.co.uk
Steering cogs can either be 3D printed plastic or metal (lawnmower ring gear is often used!). There are many 3D printed steering cog files available, this is usually a good exscuse to buy a 3D printer or they can be printed by a third party for around £50.
Link to PotatoFarmer's universal steering cogs and motor holder: https://discourse.agopengps.com/t/universal-fit-gear-system-with-quick-tach-motor-holder/6579
If you don't have a 3D printer you will need to send the STL files in the link above to someone who does. There are commercial companies online who do this (but very expensive) or lots of people on eBay offering there services (usually much cheaper!).
The Cytron motor controller and Phidgets motor remain engaged even when autosteer is turned off in the software, the Cytron applies a 'brake' signal to the motor, thus making it hard to turn when disengaged. Also when the PCB is powered off, if left connected the motor acts as a generator, so we need to fit a relay to break the circuit.
You need a 4 pin NO 12V relay, a good quality one is: Bosch 0332019110
Wire directly to Ampseal plug as follows:
Relay Pin 30: Pin 5 Ampseal
Relay Pin 85: Pin 7 Ampseal
Relay Pin 86: Pin 21 Ampseal
Relay Pin 87: Electric Motor left
There should ALWAYS be a means to physically separate the steering cog or foam wheel for when the vehicle is used on a public highway or similar.
Attachments

Last edited:
")